

If you follow the infrequent posts on this blog you will know that I am a massive fan of Pattern Emporium patterns - they are just great. Beautifully drafted, giving you a nicely cut garment, with expert instructions. I tested the Little Miss Sweetie Pie pattern for Kate prior to its release. I've already blogged about it here. I really like this pattern though - as much as I know girls like full, twirly skirts, I also love clean simple lines that aren't full of fussy ruffles and frills. I can already tell Zoe prefers less fussy clothes, she is a bit of a tomboy, she is rough and plays hard, and gets frustrated in clothes that restrict her. She does like to look pretty though, and so this pattern is brilliant for us. anyway, I'm getting way off base here.
I basically wanted to see if the LMSP dress would work in knit fabric. Not all patterns sized for wovens will work for knits, even with modifications they just don't suit the fabric. But this one has such lovely clean lines to it that I thought it might. So I tried it and it works beautifully, so I thought I'd write a blog post on the modifications I did. Here's my dress first up.

A few things to note on the dress.
Knits are not all created equal. My preference is for cotton/lycra knits that have a high percentage of cotton, but with a small percentage of lycra (or spandex), usually around 95% cotton, 5%lycra. They are easy to sew with, comfortable to wear, have excellent recovery and wash well (especially if you buy european knits). I loathe interlock and never sew with it anymore. I know spoon flower is gaining in popularity with their organic cotton knits, and I ordered some to see what all the fuss was about. As much as I like choosing the print, I am less than impressed with the lack of stretch and the poor recovery on these fabrics. I personally probably wouldn't bother with them unless you were after a specific fabric. They cost similar to top quality european knits and the quality doesn't even come close. I also love knits that have a bit of viscose in them - it is light and comfortable to wear and drapes beautifully, but I tend to use that more for women's clothing and I would steer clear of fabrics with viscose if you are new to knit sewing, as they can be more fiddly to sew with. Once you have some experience up though, they are a great option.
Anyway, getting back to the tutorial. I would recommend sizing down a size for the width if you are going to make it in a cotton/lycra knit, and also sizing down for the length - maybe not a whole size if you have a tall child, but be open minded to the fact that you may have to trim some off the bottom of the hem. Knits are heavier than quilting cottons, and so will fall more towards the ground, and closer to the body, making the dress longer when worn. Zoe is a size 2, but she is right at the top end of the scale. I made a 2, knowing that if it was a bit long, it could easily go away in the cupboard till next Spring.
I've used a cotton/lycra for this that I got from Crafty Mama's fabric, and the spotted coordinates are from Mabel Madison.
Cut out all your pieces as per the pattern size you are making with the exception of the back yoke pieces and the front facing. I will get to them in a second.
I used the simple ruffle for this tutorial. Cotton/lycra rolls at the end when it is cut. I didn't want to do a rolled hem on the edge because I know it doesn't sit well and the end will still roll up after it is hemmed, so I cut mine on the fold instead (straight edge on the fold) and folded it in half and sewed it in that way. Sorry I didn't get a picture, but I hope it makes sense. Have a look at the ruffles lower down and you will see that the edges are not hemmed, but one piece of fabric, folded in half.
You will need to alter the back yoke piece if you do not plan on putting the buttons in the back. With most knits, you will find that they stretch enough to skip them, which makes it a bit simpler to sew. To alter the pieces, you will see that there is the centre back dotted line running down the middle of the pattern piece. Ive folded mine in half down this line to make it very clear which line I am talking about.

You will also see the letters next to the piece, they are marked A. Draw a vertical line from the A on the top piece to the A on the bottom and then cut the pattern piece along this line.

Take your centre back yoke piece and place it on the fold of the fabric


Repeat for the other side and sew on the back skirt piece to the back yoke piece. Then sew the side seams together and finish the arm holes as per the pattern instructions. Then all that is left to do is to finish off the neckline. I do this by adding a band to it, and you don't need a coverstitch machine to do this. There are tons of ways of doing this and any knit pattern out there will teach you a particular way. This is my favourite way to do it when I'm not using my binder foot on my coverstitch machine.
Get your fabric that you are going to use for the binding, and cut a strip. It does not need to be on the bias, but it needs to be with the stretch of the fabric so that it will stretch as it fits over the head. You can see the measurements of mine below.


Next, fold the neckband piece in half like the above picture, but fold it right sides together and then sew down the short edge to form a circle.


I don't have a photos on my model because its still a bit long for her.
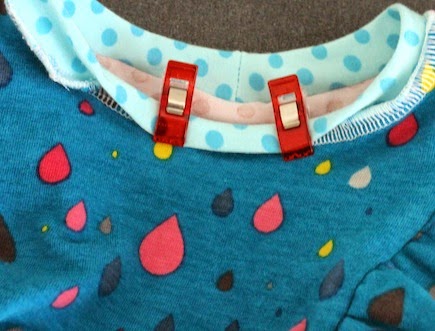
If you try it on your model and there isn't enough stretch in the neck to get over the head, don't panic. All is not lost and you can use my tutorial here to create an opening in the back of the dress.
Thanks for following along and enjoy sewing with knits!! Marnie
No comments :
Post a Comment