

This pencil case is a great option for anyone battling the endless packets of stationery as we all get the supplies ready for the new school year. It keeps the colouring supplies separate from the every day lead pencils, biros, glue stick and scissors but keeps everything together in one place. If you've made a basic zipper pouch of any sort before you will have no trouble with this.
You may be forgiven for thinking I'm a tad obsessed with pencil cases at the moment. I wrote my original Pencil Case tutorial last year for Issue 5 of One Thimble.

Then I sewed up a frenzy for School teachers gifts at the end of last year

and the Chunkster Pencil Pencil Case was born.

Now it's the double banger. Maybe it's because I was desperate to have some sewing time which was encouraged by the kids during the school holidays, maybe it's because I wanted a trip with all of them to the fabric shop so that they could "choose their own fabric." Whatever it was, it was great to get back on the sewing machine again, even if only for a few hours.
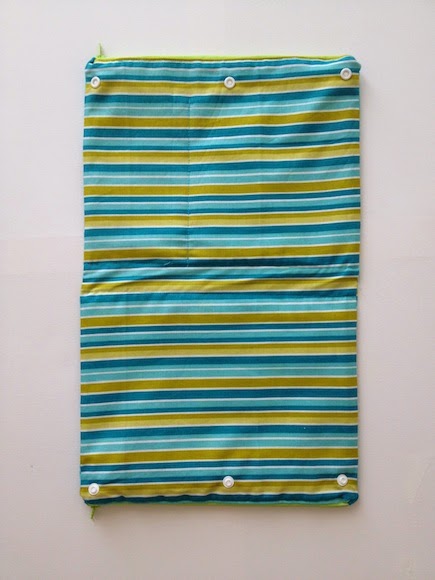
When this pencil case is complete, it measures 10.5"x8". If you're not after something that big simply make the length shorter. For this pencil case, each piece of fabric you use is double the length of the finished product. So work out what size you want the finished product to be, double it and add an inch for seam allowances.
For example, if you want your finished pencil case to only measure 6" in height when it is finished,
6 x 2 =12 +2 =14 inches.
At this point, I'd like to apologise to all those Aussie girls out there who are wondering why on earth I work in inches. Well I used to work in cm but being a quilter I got so sick of converting everything to cm first.
- 4 pieces of fabric, each measuring 12" x 16". One is for the outer shell (on the left), one is for the lining (in the middle) and the 2 on the end are folded in half and for the zippered compartments.
If you're using regular quilting cotton, you'll need a piece of interfacing on the outer shell fabric to give it some stability.
- 2 zippers, 10"/25cm in length
- 4 zipper ends, approx 4" x 2" each, folded in half, wrong sides together.
- 3 sets snaps/ studs

To being with, fold inner compartment pieces in half, right sides together and press. Set aside.

Using a zipper foot, sew folded zipper ends on each end of both zippers.
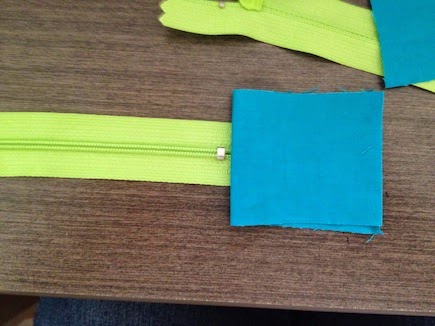

Unfold one inner compartment piece and lay one zipper on the top, matching up top edges, then place top edge of your outer shell piece, with right side facing down on top of zipper.


Next, take the raw edge of the inner compartment piece and fold it up so that the raw edge meets the free edge of the zipper on the underside of the zipper.


Kate
No comments :
Post a Comment